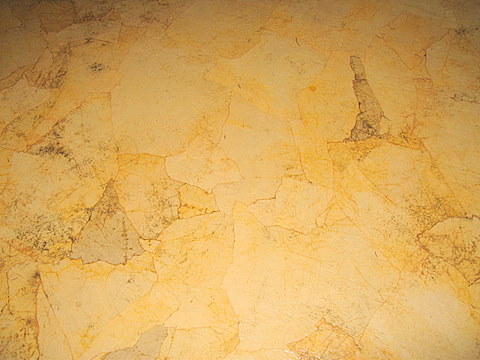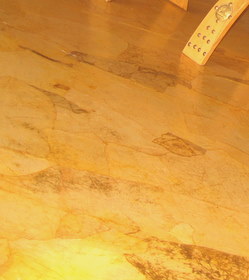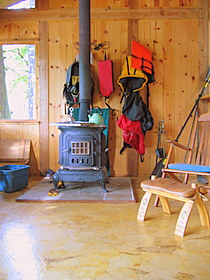
My cabin in BC has a plywood floor. I worried about putting wood flooring down because of the humidity of coastal BC, but hated the plywood. A friend told me about an art gallery that put down a paper bag floor. She couldn’t remember how they did it, so I just experimented with it.
I bought rolls of brown paper–two different thicknesses. Then I ripped a jagged piece off the roll, crumbled it up, dipped it in yellow deck stain, brushed the floor with clear water based polyurethane, smoothed the piece of paper down over the polyurethane, and brushed over the top of it with more polyurethane.
Then I went on to the next piece. Sometimes, I would dip the crumbled wad into the polyurethane for more dramatic lines. The different grades of paper gave even more variants.
I saved the straight pieces for around the edges.
After I was all done, I put several more coats of clear polyurethane over the top. It took me a whole week, working all day, to finish a 500 sq ft. floor, but time is what I have lots of.

That floor is awesome! Any more pictures??
Okay, I did find a few more pictures and posted them with the article.
-crow
Floor looks great! I need HELP with mine! Want to brown bag my screened porch (totally under roof, little sun, no rain thus far). Subfloor is stained plywood, sanded for better adhesions. Tried sample board using oil-based spar poly for adhesive and top coat. Edges of paper are curling up and will not lay down. Tried adding more poly, even dipping pieces, nothing works. Any ideas? Please do not share my email address with anyone. Thanks for your help.
Greetings!
While I have just about covered the interior of our home
with this treatment on the walls, I am only now trying the
floors.
What I have discovered is that the paper will simply NOT
stick to the floors. We have painted plywood floors. I put
a bit of poly on the floor, then the paper, then rolled over it.
The paper does everything but stick, or even lay down for
that matter.
While this method doesn’t seem to be working for me, I did
try booking the paper with paste, applying, then immediately
rolling polyurethane over it. Though it does work well, I am
concerned with the humps and bumps, which were not there
when I ran the poly.
I’m hoping the bumps will go away as they do on the wall
procedure, but alas, still at the testing stage, so not covering
much ground (pardon the pun) at this point.
Your floor is lovely, and must look even better in that it is
in a cabin.
Karen
Your floor is beautiful. What sheen of poly did you use? Satin, semi-gloss or high gloss? thnak you
Floor looks wonderful! My partner and I are thinking about trying this out in our house. Just wondering how it stood up to everyday wear and tear? We have a large rottie living in the house with us, so we want to make sure that whatever we install can stand up to her. Any other tips would be very helpful! Thanks.
That is GORGEOUS!
Thank you so much for this – I am purchasing a place where the carpet MUST be replaced & I prefer hard surfaces yet do not have a budget for it. Plus, it looks AWESOME.
I love this floor, I think I will try it in my kitchen as I have to completely gut everything and need to cut some costs. This will be super cheap compared to the other substrates I have been looking at. Have you had any problems with the paper pealing up or getting damaged through the poly?
My mom came up with the idea to use adhesive spray glue on the floor first then put the paper bags down then we put to poly on top so far it seems to have worked much better then just poly. But watch out for all the smells! We also used mini rollers to flatten out the paper bag with the adhesive then we flattened it out again after the poly, not the same roller of course! Good Luck! 🙂
What a beautiful floor! I’m moving to an old log building, and I have decided to make a floor like yours. I particularly like the coloring of it. Did you use oil based or water based yellow deck stain? Thank you for sharing!
I did my bedroom a couple of years ago with the paper bags. It has held up beautifully. I am going to be doing the spare bedroom in the next couple of days and am kind of excited! I used glue to put the bags down then used a couple of coats of water based polypolyurethane after the glue was dry. I cut paper bags the first time (and did not crumble it) and like the look, it looks like tile and the variations of color is cool too. This time I am going to purchase the heavy duty paper that can be bought at hardware type stores to cover flooring and I am going to tear it, thinking about crumbling it this time for texture.
This post looks to be from 2007. As it is now 2010 going on 2011, could you please let us all know how your gorgeous floor has worn over the years? Many thanks for the original post and any other info you could give.
I haven’t been used that cabin much since I did the floor, so hard to say.
I have actually done just this only there is a much more simple way!! Mix elmers glue with a little water just until it is thin but there is drag. (roughly 1c glue to about 2c of water) also mod podge in place of glue works really well on surfaces that may not normally take paint such as laminate. Put the torn pieces of paper wadded up in the glue mixture and scrunch then re dip until paper is saturated. Use your fingers scissors style to squeegee off the paper. rub a little glue on the spot where you will put the paper then smooth the saturated paper down getting out any air bubbles. When it’s all done and completely dry you can even use stain to darken it or make it more rich looking. I recommend using a warmer color and MAKE SURE ITS OIL BASED!!! Also using a lambs wool applicator works the best. Really saturate the paper let it sit for about 2-3mins then dab up with an old towel. After the stain has dried poly, poly, poly!! Used a floor grade and If you’re not sure what type of gloss and want to test it always start out with high gloss. If you put high gloss over semi or satin it causes a cloudy effect that is not pleasing. Hope this helps!!!
OO I worded a part wrong.. dont leave the paper in the glue. only do one or two pieces at a time or the paper will be too “soggy” and tear when you squeegee.
Heather, I don’t know who you are, and it’s 2016 now but I thank you from the bottom of my heart for your info! Sitting here with a very expensive can of floor quality poly and NOTHING is sticking! I finally got mad and used straight up mod podge and the paper is finally staying. Hoping this sucker stains then I am going poly,poly, poly!