Hiking in Chaco Sandals

On the PCT (Pacific Crest Trail) I hiked in running shoes. Almost immediately, my feet started to hurt. Excruciating pain, every hour sometimes I would have to stop and rub them back to life. The pain was from the ball of my foot. Even though I bought 12 different pairs of shoes on my hike, I could never find anything that relieved the pain. If I hadn’t had 20 years of dreaming behind me on hiking that trail, I don’t think I could have stayed on. After I got back, it was probably a month before I could even get up and walk to the bathroom without shoes on. When I would go out for walks, after an hour my feet would start to hurt and go numb again. I thought my hiking days might already be over.
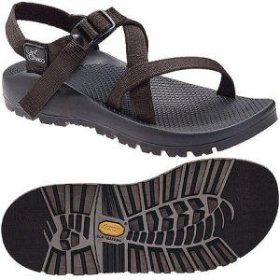
chaco-z1.jpgThe day before heading out to Thailand a bought a pair of Chaco Z/1 sandals; they are hiking sandals with an orthopedic foot bed. When I got off the plane I walked for hours through Bangkok; it’s not a pleasant place to walk but I was so happy that my feet didn’t hurt that I just kept walking.

Since then I have hiked only in Chaco sandals. On the AT (Appalachian Trail), we referred to them as strap on boots, so sturdy is the foot bed. Here are some things I know about hiking in Chaco sandals.

Wear socks: Your feet will probably never be tough enough to wear Chacos for very long without socks; not wearing socks is nice every once in awhile but if I would keep them off for very long, I would get blisters and sores where the straps rubbed my feet, also with out socks my feet would get dried out and crack, the neoprene socks are particularly helpful to prevent cracks as they keep your feet moist. I tried the waterproof socks and found that they stunk so much that even among hikers I was a bit of a leper. Even after washing, they stunk. After a week, I threw them away.

Snow. In the snow, or when it was cold, I wore neoprene socks; still my feet were cold and uncomfortable and the snow would build up under my toes. More then anything I think it is psychologically uncomfortable for me to walk in the snow in sandals. The longest I have continuously walked in snow, was 12 miles in 6 inches of new wet snow. My feet were fine but I was worried.
Chacos can be resoled. I did get one pair resoled but then, after awhile, the straps broke. Therefore, if you are going to have them resoled I would recommend having the straps replaced too. When my strap broke, I taped my sandal to my foot with electrical tape and hiked for three days like that until I could get a new pair sent to me.
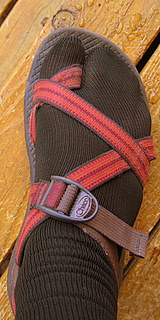
cabin-911.jpgThe Chacos with the toe strap. I hiked the AT and the Florida trail in the Chacos without the toe strap; since then I have switched to the ones with the toe strap: the Z/2. I like hiking with the toe strap, my feet stay warmer and the ice doesn’t build up under my toes in the snow as bad. I wear them with tabi socks. I think there now may be some neoprene socks available with the split toe but I don’t have a pair so when I want to hike in neoprene socks I have to step on the toe strap. Comfort wise it’s fine but the problem is that if you hike stepping on the toe strap too much it becomes impossible to pull the toe strap back out without the help of a pair of pliers.  Update: After about 500-700 miles on my latest PCT hike, a callus developed between my toes and I had to switch back to the Z1 style.

homemade-tabi-socks.jpgMake your own toe socks. Brawny on her backpacking site, http://www.trailquest.net/, gives these instructions for making your own tabi toe socks: “Make a straight mark (with a felt tip pen or marker) on the socks between the big toe and second toe. Then sew a “V” shaped seam on either side of the pen mark, and then make a cut on the straight pen mark.”

Cracks. In addition to wearing socks, you might find that you need to file down the dry skin and put some grease into your feet and put them in plastic bags or neoprene socks to heal them.  Bag balm works really well, but is hard to find on the trail.  Carmex is available at most places.   Also if you have petroleum based neosporin, that will work as well.   Brush on super glue works wonders, but is only a temporary measure—eventually you have to take care of your feet.

Sizing. It’s important to have just the right size so that your feet fit the orthopedic foot bed right. You can get them in wide sizes for both men and women. I have heard of people who bought them extra long because they were afraid of stubbing their toe and they ended up not happy with them. I’ve never stubbed my toe in them, even though my toes go right up to the end. I have had sticks poke me from the side, but it just hurts for a moment and I got good at tuning out those assaults.

The NRS Neoprene Sandal Socks w/ HydroCuff is the best neoprene sock I have found.   They come plenty big so you can wear a warm sock under them.

note: Joe over at Zpacks has worn sandals in blizzards in Colorado. He wears waterproof socks—maybe if I had worn regular socks under them I wouldn’t have had a problem or maybe he had better waterproof socks then me.

Related post: Stalking the elusive split toe tabi sock

Cracked feet

Brush on super glue


An entertaining fire starter.

While I was out hiking on the PCT this summer, I met a woman who was carrying some diversions with her. She carried knitting, a book, and some crosswords.crossword.jpg A book always seems too heavy to carry and I don’t know how to knit, but a crossword puzzle ripped out of a newspaper seems like it would be a light diversion to have when a storm keeps you in your tent or you just feel like hanging out for a day. It would also make a good emergency fire starting material.
Where to pack your wet tent.

Lining my pack with a clear plastic bag not only keeps my stuff dry when it rains, it keeps my wet stuff separate from my dry stuff. When my tent is wet, I slide it down in my pack on the outside of my packliner thus keeping it from soaking my other stuff.

If the sun comes out while I’m hiking, I stop, spread everything out, and let it sit in the sun for 20-30 minutes and dry out.

Travel warnings and money belts.

The year I went to Java and Bali all Western nations where warning their people not to go there. While I was there, the State dept. issued a warning that they had good reason to believe that there was a plan to start killing westerners after Ramadan. The state department warnings always seem to be overly cautious. If you believed everything, they said, you would never go anywhere. Still it’s good to read the warnings and advice. http://travel.state.gov/

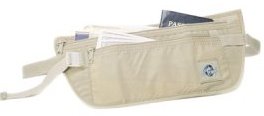
Because the situation was considered shaky there, I never left my room without my plane ticket, passport, visa card, money and travelers checks. I kept it all in a moneyeaglecreek-moneybelt.jpg belt worn against my skin around my lower waist in the area that is covered by my pants. Worn against my lower back it was quite comfortable, unobtrusive, and didn’t create bulky lines. I even slept with it on sometimes. The money belt that I used was the Eagle Creek – Deluxe Security Belt. It has two pockets; one big enough to hold plane tickets. It has soft fabric that lies against your back. There are lots of these like this one. I haven’t tried others but the Rick Steves Silk Money Beltrick-steves-money-belt-1.jpg is made of silk, has a lot of good reviews on Amazon, and has a plastic pocket for your passport which would be nice because moisture from sweat is an issue. Whatever you buy, I would recommend that you make sure it is big enough to hold a plane ticket.

I have tried the ones that you wear around you neck and they create a big bulge under my shirt and a big ugly string hanging around my neck; I wouldn’t recommend them.

Note: I never revealed my money belt when out in public. I carried a pouch for all the stuff that I knew I would need that day. It had a strap and a wide belt loop, so I could secure it across my shoulder and loop it through my backpack’s hip belt for added security.  If I did need something out of my money belt, I would duck into a restroom and take it out there.

How to load and unload your kayak by yourself.

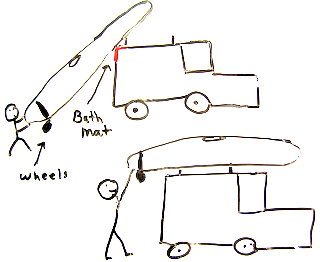
Before I would buy my fiberglass Necky Looksha, I wanted to see if I would be able to put it on and take it off my roof rack by myself. I could, but just barely. After a day of paddling, however, I found it really hard, so I devised this method that makes loading and unloading easy for the lone paddler.

1. Put a bath mat on back of your vehicle where your kayak will touch it: so that it won’t scratch your car ( the rubber on the back is so it won’t slide of your roof.)

2. Put a V-shaped kayak foam block on each of your roof rack rails.lone kayak loading

3. Attach wheeled kayak cart to the back of your kayak.

4. Lift front of kayak up on roof.

5. Go to back of kayak, lift up letting the front of the kayak rest in the V of the foam block, and push on.

6. Leave the wheels attached so they are ready for you to unload again.

Some considerations when shopping for a sun hat.

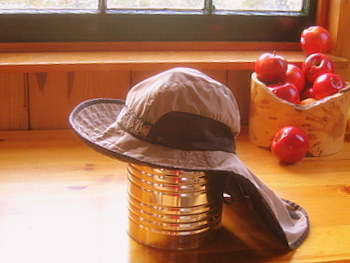
cabin-890.jpgI feel a sun hat is essential. My sun hat is the Sunday Afternoons Adventure Hat . I have been wearing one, everyday, for 9 years. This is why I think it’s the perfect sun hat:
1. Full sun protection. This hat offers full sun protection yet with the sun cape instead of a brim in back, I can leave my hat on and lean back in a bus or train seat without knocking it off. If you have a high pack, you may find that a hat with a full brim will get knocked off by your pack hitting it in the back, make sure your hat will work with your pack.

2. Chin strap. When the winds kick up if you don’t have a chin strap your hat will blow off your head and off a cliff. I keep the chin strap hidden up in the hat until needed because I don’t like the way a chin strap looks. If your hat doesn’t have a chin strap you can secure it to you with two alligator clips with a string between them; I have seen them for sale at kayaking stores.

3. Packable. Needs to be able to be rolled up or stuffed in a pack. If it’s not packable, it will be a mess before very long.

4. Washable. I probably washed my first one 50 times and would probably still be wearing it, had I not left it in a restaurant one day.

5. Adjustable — important so I can make it bigger when I want to wear my fleece balaclava under it.

6. Floats— important if you kayak or boat.

Versatile. I have worn this hat when I worked on a paving crew, hiking, kayaking, wood cutting, back country skiing, travel, and general living and it has worked well for me.

Remove the label. It comes with the manufactures label on the outside of it; remove it for a much better looking hat. The first Sunday Afternoon Adventure hat I bought came with the name tag sewed on; I removed it with a seam ripper. On the second hat, the tag was sewn into a seam of the hat; I cut the name tag off. Why, does someone go to the trouble of designing a great hat and then screw up the whole effect by putting their name on the outside of it?

Style tip: There is no need to wear this hat with the brim always turned down. When you don’t need maximum sun protection, turn the brim up a bit, for a more dashing style.

Related post: How to keep your hat from blowing away.

Watches for hiking and travel.

Before starting my PCT (Pacific Crest Trail) hike, I was given a Suunto compass/altimeter watch. I didn’t feel like I needed one, but I brought it with me. It turned out to be one of my favorite pieces of gear. Combined with the data book, that would list all the altitudes, I found it easy to figure out where I was. I also had opportunities to use the compass. Periodically, I would set the declination on it. The declination of every section is listed in the guidebook. A watch is also helpful for using “dead reckoning” to figure out where you are, (example: I have been walking 2 hours; I usually walk at 2.5 miles an hour so I must be…)

The compass watches’ batteries are only good for about a year, and I have had terrible luck in changing the batteries. I would recommend going to a jeweler to have it done. That said even still, my Suunto started leaking after about a year. My next one was a High Gear. It stopped working after about a year too; I changed the battery but it still didn’t work.watch.jpg

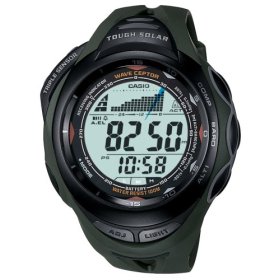
Yesterday, I ordered this Casio PAW1200 Pathfinder Atomic Solar Triple Sensor watch, which is a solar powered altimeter/compass watch. Because the battery will never need changing, I’m hoping this one will last. It also sets it’s self by an atomic clock. Even if it doesn’t see any light for 5 months it’s supposed to keep working. My Casio data bank was always a good and dependable watch and I’m hoping this one will last as well.
You’ll want to set the declination and altitude. To find out what the declination is for where you are or where you are going, visit: http://www.ngdc.noaa.gov/seg/geomag/jsp/struts/calcDeclination To find out what the altitude is for where you are, download Google Earth and type in your address. If I come to a place with a elevation sign and it doesn’t jive with my watch I reset the altitude.

For international travel, I used to carry a Casio data bank; it would hold all my important numbers and phone numbers. The calculator was essential for figuring out what things cost in dollars. In addition, it listed the current time in cities around the world. I also liked that the light on it, was bright enough to light my way through a dorm of people sleeping, down some stairs, and into a bathroom that was built with large boulders protruding into it.

Update:  I called Casio and asked how to set the declination on it and the woman said, “the what?” and then read the manual that I had just read 3 times that didn’t say anything about how to check the declination. She said that she thought that you couldn’t do it, I said that that is crazy to sell a compass watch at that price and not even be able to set the declination. Then she said that the watch specialist would call me back but so far, no call.

Clothes bag.

I wear nylon hiking pants and a nylon, long sleeve, button up shirt, when hiking. In my clothes bag I usually carry the following:

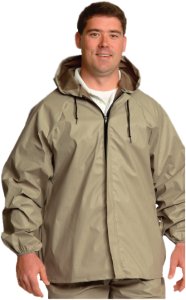
drop_stoppers_jacket.jpgSet of “paper” rain gear. Right now, I’m carrying Drop Stoppers the top and bottom together weigh 10.5 ounces (311 grams). I like the jacket because it is long, and has pockets but I don’t like the pants because without a drawstring waist they get pushed down lower and lower by my pack and the cuffs don’t have elastic on them so they drag in the mud. I like Frogg Toggs because they look better, which is nice if you are trying to be seated at a restaurant while your hiking clothes are washing. They are also fuzzy which I like because they make nice pajamas and are comfortable for hanging out in. Frogg Toggs are a little heavier, a little more durable, and better looking. The also cost a lot more and take longer to dry out. The pants have elastic at the cuffs and side zips and a drawstring waist. They weigh 14 ounces for top and bottom combined. I have carried the O2 jacket, which is light and worked well too. To repair a rip in “paper” rain gear use clear packing tape.
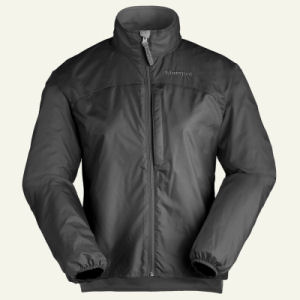
marmotwmndriclime.jpgMarmot dri-clime windbreaker. A nylon windbreaker with a light micro-fleece liner. It weighs 10 ounces (283 grams). I like this jacket; it works for varying temperatures and is quick drying. This jacket has the manufacturer’s name plastered across the front of it. I took a sharpie and went over it to make it less noticeable. I really don’t like to have names on my clothes so if I find something like it without a name on it; it will be replaced. If you are are on a tight budget this item could be replaced with either a light wind breaker or light fleece top from a discount store like Target or Walmart or a thrift store.
heliosvest1.jpg

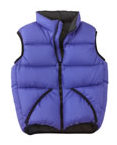
Feathered Friends down vest. It weighs 11 oz (311 grams). When I bought this, 6 years ago, it was the lightest around, now you can get a whole down jacket from Western Mountaineering for the same 11 oz. or the down vest for only 5 oz (141 grams). For budget minded you can probably find a poly filled nylon vest at the discount stores for 10 dollars even less at the thrift store.

hood.jpgFleece hood/balaclava – This can be worn as a neck warmer, a hat, headband, a hood, or full balaclava. Extremely versatile and it doesn’t fall off when I’m sleeping. If your head and heart are kept warm, the rest of your body will follow. These come in different colors, from different manufacturers, in case you don’t want to look like a Ninja. This winter, Walmart was selling these for 4 dollars.

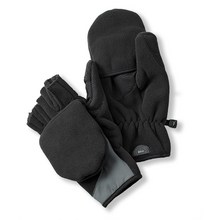
glomittts.jpgFleece glo-mits I have carried glo-mitts for all my hikes. I like glo-mitts because I don’t have to take off my gloves to do things like light my stove and cook dinner. I think it’s the wind block fabric that makes these so slow to dry, but they keep my hands warm even when wet. Not all glo-mitts come with the thumb flap; I find the thumb flap to be essential. Wallmart sells ones like these in the hunting section for something like 4 dollars.
socks1.jpgExtra socks- pair of neoprene socks- since I wear sandals when I hike; I wear these when it is cold or snowy. I also often carry an extra pair of hiking socks, as well.
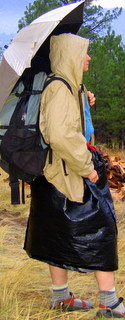
cabin-162-2.jpgThe one ounce hiking rain skirt: Cut the bottom out of at cinch strap garbage bag, put it on and tie around your waist. It will keep you dry and offers great ventilation. Just scrunch up your pant legs to the knee so they don’t wick water and put on your hiking skirt. It’s also nice to have on when you want to sit down and take a break but everything is wet. When in camp, if you hang your food, you can use the hiking skirt as a rain cover for your food bag. Just get the regular garbage bags, not the heavy-duty contractor’s bags: some of them weigh 5 ounces apiece.

This selection of clothing will keep me warm, comfortable, and dry most of the time. Even when it is below zero (-18C) here, when I go out for my walk, just these clothes keep me warm. I have gone much lighter but this is what I find will sustain me through a long hike with varying temperatures comfortably.

About color. After I have been on the trail for a while, I get tired of seeing nothing but brown, green and black. Frogg Toggs used to come in red. I found them cheery to put on. Something colorful is nice to have if you are going to be on the trail for a long time.

My clothes bag makes a nice pillow. If I’m wearing most of my clothes to bed, I augment my clothes bag with the stuff sacks from my sleeping bag and tent, plastic bag pack liner and anything else I can find to make a pillow.

Some considerations when shopping for Hiking Pants

Here is what I look for when shopping for a pair of hiking pants:cabin-854.jpg
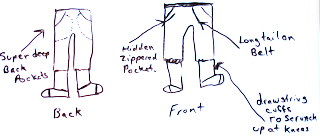
Pockets. A zippered pocket for holding money and ID is nice to have. Big pockets are important to me. I need them to hold guidebook pages, maps, and snacks. If the back pockets are high, you can’t access them while you are hiking. The all time best backpacking pockets I had were on a pair of Mountain Hardwear pants. These deep, back pockets could hold tons of stuff, yet when I sat on them; it didn’t bother me or the stuff in my pocket. I also never lost anything out of them. I could easily access them while hiking without removing my pack. They gave the pants nice clean lines instead of the bulky thigh enhancing pockets most hiking pants have. I think they may have changed that design on their pants but I have seen it on others.

Quick drying. My hiking pants are always nylon.

Draw string cuff, so that I can easily and securely keep my pants scrunched up at my knees. Velcro doesn’t work, it will get all muddy and won’t stick and then the pant legs drag in the mud and wick moisture up to the rest of the pants making them all wet. Mountain Hardwear had or maybe still has a good hidden drawstring system.

A nylon web belt is good, as I often lose weight on the trail. Mountain Hardwear’s belts always eventually came out and I could never get them back in the holes. I like a belt with a long enough tail that I never need to unbuckle the belt to take off my pants.

Chamois crotch. Mountain hardware use to line the crotch of its pants with chamois. Very nice feature.

Light color. I like light brown/tan. Dark pants can get very hot in the sun. Some light colored hiking pants are so thin that they turn translucent when wet; very bad feature if you ever hike without underwear.

Tip: To create a cone of death around me, at least as far as bugs are concerned, last summer, before I went hiking I soaked my clothes in Sawyer soak system. It lasts for six washings and gives you the same protection as the “bug off� clothes.

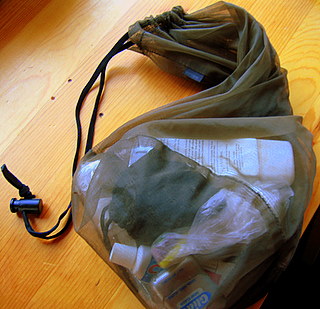
Ditty bag

For a ditty bag, I carry a mosquito head net. It’s light,(.65 ounce or 18 grams), it’s easy to find what I want without dumping everything out, and it doubles as a head net when needed. In my ditty bag, I carry:ditty bag
Water treatment
First aid kit
Knife
Sun block
Dental floss with needle inside.
Toothbrush (child’s size stored in plastic sandwich bag)
Toothpaste (optional, but I always miss it when I don’t bring it.) trail size.
Camp suds ½ ounce(15ml) bottle
Brush
Menstrual cup.

How to poo in the woods

cabin-835-3.jpgGo a fair distance from the trail, a campsite, or a water source. Dig a hole. I have found the little plastic orange shovel is useless for digging a hole. When the digging is good, my foot, a stick, or a rock will work just as well and when the digging is hard, the shovel is worthless. When the digging is hard, I look for natural holes like uprooted trees, or turn over rocks that have sunk into the earth.
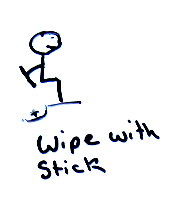
cabin-835-4.jpgFor toilet paper, I use a stick or rock big enough to keep my hands away from any chance of fecal contamination. There is speculation that it isn’t the water that makes hikers sick but there own feces.
For when I feel a need for toilet paper, I carry a few paper towels in a ziplock sandwich bag. When I’m in a situation were a stick won’t do, paper towels work much better than toilet paper, travel better, and can be wetted for a more thorough cleaning.

It is thought of as a good practice to pack out any paper that you use.  Some people have burnt it and caused huge forest fires. (there is a sign on the PCT that says, “this forest fire started by a PCT thru-hiker burning his toilet paper� )

If there is any chance of fecal contamination to my hands, I bring out my wash kit and wash them.

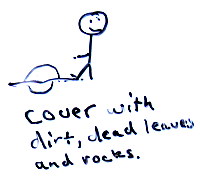
cabin-835-5.jpgIf I have used the hole from an uprooted tree, there is lots of loose soil to bury my poo in. If I have used the hole from a rock, I rake what surface duff and dead leaves I can find over the poo and put the rock back on top of all of it. From reading the The Humanure Handbook: A Guide to Composting Human Manure, I know that this is not the way that poo composts best. It needs to be kept moist and covered loosely with plant material so that it can get very hot and kill the bad stuff. It is, however, the way things are done on the trail because we don’t want to encounter other peoples poo.

Related posts: Hiker bidet, Peeing in the woods

Staying warm at night.

Here are some strategies I use for getting through a cold night.

  1. Cover my head. I always bring a fleece hood/balaclava. It can be worn many different ways and it doesn’t fall off my head at night.
  2. Hot water bottle. I carry a canister stove. I reach out of my tent, turn it on and have a hot water bottle ready in under 2 minutes. When I carried a bigger pot, Icabin-802.jpg carried the bigger liter size Nalgene bottle. Placed between my legs, it would keep me warm all night. Now with the smaller pot, I carry the smaller 1/2 liter bottle and it will only keep me warm for about 3 hours. Of course, I’m careful to screw the lid on tight. I have slept with a Nalgene bottle in my sleeping bag for hundreds of nights and have never had one fail me. Sometimes the soft milk white bottles get a little soft and a bit distorted but they always pop back out later.
  3. Eat something.
  4. Zip up. I usually don’t zip my bag up; I just stick my feet in it and throw it over me. However, if it gets really cold I zip it up and stick my head in the hood.
  5. Exercise is a good way to get warm again. Do some crunches.
  6. Use a vapor barrier, a vapor barrier works like a sauna. It keeps a warm moist layer of air around you. I used to carry a bag that had cold spots and if it dropped tohotsac.jpg near freezing, I would be cold. I sometimes carried a hot sac vapor barrier as a pack liner, then, and when I would climb in it, it would offer up instant warmth. If you aren’t really cold, a vapor barrier will make you sweat a lot and soak your clothes. A garbage bag pack liner could be used the same way, although it will only cover some of you. You might want to try sleeping in your rain gear, if it’s dry, and using that as a vapor barrier. I have heard of people sticking their feet into their pack.
  7. Empty your bladder.  Outward Bound told me that your body has to use a lot of energy keeping your urine warm.  I don’t know it its true.  However, it might be so… I do it.  I do think  when you are really cold and you don’t want to get out of your bag to pee, that it’s always a good idea to brave the cold for a bit and do it, because you are just that much more comfortable and moving around  could help warm you up, and for those reasons I will probably keep doing it.
  8. An effective way of dealing with discomfort, for me, is to remember the Buddhist phrase: “The path is easy for those with no preferences.� I realize that it’s my attachment to comfort that is making me suffer; I give it up and go to sleep.

Night Hiking

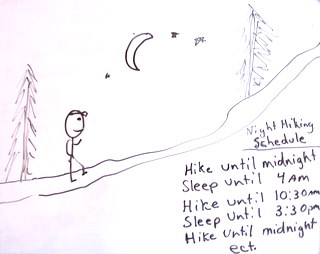
When the days are scorching and the nights are cool, I find it a good strategy to hike at night, especially when there is a long way between water sources.

At first, I tried walking all night long and found that to be torture. Half way through the night, I started to hallucinate, and by 5:30 am, I threw my pack down on the trail, flopped over it and went to sleep. What I found worked best was to hike until about midnight, sleep until about 4am, hike until 10:30 am, and then sleep again and start hiking about 3:30pm.

I like to carry a little Photon Light, in addition to my LED headlamp, just in case something happens to my headlamp and I need to make camp. It’s also good for a light if I need to change the batteries, in the dark.

Tip: If you lose the trail, try shining your flashlight low, right over the surface of the ground. This way you can often pick up the footprints of the hiker who went before you. If I still can’t find the trail, I just go to sleep and find it when it gets daylight

cabin-830.jpg

Related post: Backpacking Lights

Logistics for an international adventure.

  1. Find a cheap ticket. I found my cheap tickets in the very tiny adds in the travel section of the Sunday paper.
  2. moontravel.jpgBuy a travel guide for the country that you will be going to. Read it before you leave, paying particular attention to the “visas required” section, and pack it. I recommend Moon travel guides. 
  3. Pack- Go light-under 20lbs. Make sure it will fit in the overhead so you don’t have to check anything. Clothes motto: wear one, wash one. (only 2 sets of clothes) There is often a very stingy weight limit for carry on, so it’s good idea to carry a very lightweight day pack to split your load up.
  4. Go. Keep your self open to new adventures. Remember, whatever doesn’t kill you will make for a good story.