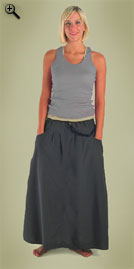
Improving my trashbag rain skirt

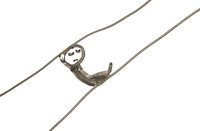
I improved the cinch strap on my trash bag rain skirt by tying a piece of string to a safety pin and pushing it through  the cinch strap pocket.    When I got to the places where the pocket was welded together, I pushed the safety pin through one side of the plastic pocket and back in to the cinch pocket on the other side of the weld.    When I got to the end I  removed the safety pin and put a toggle on the string.

A person could improve a trash bag rain cover the same way.

Converting my mummy bag into a backpacking quilt

After spending a September in the Sierra’s, I want to be in the mountains every September.     Only problem is my sleeping  bag is too cold to be in the mountains in September.   I’ve decided I need a warmer bag, only, the only way to do that and not increase my weight  is to go with a 0 or 5degree  backpacking quilt.    Only problem with that is they are crazy expensive.  For instance the Nunatak Arc Expedition would cost me over 750 dollars once I factored in shipping,  over fill, light weight fabric surcharge and sales tax and it’s not like REI where you can just return it if you don’t like it.    Also I’d have to wait 6-8 week to get my bag.    You’d think not having a hood or a zipper it would be fast and cheap.

Then I had the epiphany to turn my old Marmot Helium into a backpacking quilt.    Searching the Internet I found another hiker who did this.   Purebound turned a 110 dollar– 2Lb 4oz mummy bag into a 400 dollar– 24oz sleep quilt.

I cut off the zipper baffle, the 3/4 zipper, the hood and the first baffle and used the down from them to stuff into the rest of the bag.   Then I slit the opening all the way down leaving a little foot box to stick my feet in and sewed everything back up.     It went from 34 ounces to 28 ounces and I kept all the down.

I like it  but every time I look at it there is another rip in it.  It has about 20 patches and repairs done to it and I ripped a baffle one night when I slept close to a sharp rock.    Also I think it could still use some more down.

So now I’m eyeing my new Marmot Helium and thinking about doing the same thing to it.  Only this time I’m thinking of slicing open up my old Marmot Helium and stuffing a lot more down into the new one.   One thing I learned doing this is there is a whole lot of down in a sleeping bag and it hardly weighs anything.  So if I, say, added 3 or 4 more ounces of down to the new bag and cut away all the stuff I didn’t need, I think I could have a seriously big fluffy quilt for  2 lbs.

If you want a down hood you can save the hood piece and wear it on your head.   I decided that I would rather have the down from the hood on my body because I already carry a fleece balaclava and there is still enough length to throw the bag over my head if it’s really cold.

I may put some straps on it to cinch the bag around me, but right now I’m  thinking that won’t  be necessary as I left the bag fairly wide.

Some people may say that I’m taking 750.00 dollars in mummy bags and trying to turn them into a 750.00 dollar quilt. 🙂

Hiking Barefoot/ Vibram Five Fingers on the Pacific Crest Trail

After reading “Born to Run“, I had high hopes of never buying another pair of shoes.   I had visions of flitting down the trail like a fairy in bare-feet with nothing in my food bag but chia seeds.

But the reality didn’t measure up in the long haul.   I don’t know if barefoot hiking is compatible with  hiking 10-12 hours a day, month after month. When I get tired,  I want  to take nice long strides and slap those feet down anywhere and make some miles.    I also get  clumsy at the end of the day and that doesn’t mix well with bare-feet.   It takes a mental adjustment to hike in barefeet  that I sometimes found hard to make when I got tired.  It was slow and sometimes painful.

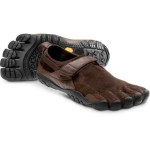
I then switched to Vibram Five Fingers. Though they offer some protection, if you step on a rock or a stick with your arch,  the pain reverberates through your body.    Another thing is your toes are all separated which offers the opportunity for each toe to individually snag on something and get wrenched.

I put them away for good when I caught my little toe, which I think I may have broken a few days earlier,  and it caused me so much pain I thought I was going to pass out.

You can hit miles of fist size rocks that would be nothing to hike across in shoes and those sections become tedious and exhausting in Vibram Five Fingers.

While wearing my Vibram Five Fingers and hiking south I met many northbound thru-hikers who had started the hike with them but quickly abandoned them.

The one thing I learned from going barefoot is a gratitude for shoes.    If you like hiking day after day for months, taking long carefree strides; I highly recommend shoes or hiking sandals.

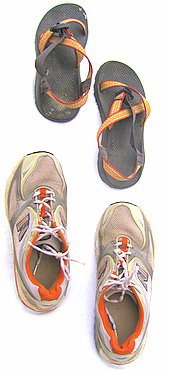
My trail tested compo is Chaco Z-1 woman’s size 9 wide and New Balance 817’s mens size 9.5 EEEE with NB IPR3010 Pressure Relief insoles with the metatarsal rise. Switching shoes all day long I can hike 30 mile days.   The only problem I have with this set up is the shoes are like ballet slippers when they hit snow and it’s a lot of money to shell out on shoes for every thru-hike.    I also don’t like having to carry two pairs of shoes…. but with my feet I know it’s what I need to do.

I was really optimistic about going barefoot and gave it my best shot but it didn’t work.

Gear review:BearVault 450 bear canister

It was  4am and I was lying in my frosty tent in the Sierras, thinking how splendid a hot beverage would be right now.  I was hungry as I hadn’t eaten dinner the night before because I was low on food and one of the ways I ration my food is to skip dinner.

I was thinking: for the same weight as the bear canister I could have brought my stove, pot, fuel canister, and 5 snicker bars.   Right now, I could be drinking a hot beverage and eating a snicker bar.   That would be good, but instead I have a bear canister.

I reached out of my tent, grabbed my frosty bear canister, tried to open it—it didn’t budge.     I straddled it and tried to open it,  it wouldn’t turn a bit—it was completely locked up.   And that is when I renamed my BearVault 450 bear canister: my “Goddamn, Piece of Shit!” bear canister.

The next food was 50 miles a way and it wasn’t 50 easy miles.  It was 50 of the hardest miles on the PCT.    I angrily broke camp, stuffed my  icy tent into my pack, and stomped off into the darkness.

Although I was mad and hungry there was a little part of me excited about the challenge of hiking 50 miles without food.

About 10am  I met a couple that I had been seeing off and on since Ashland.   I told them my bear can story.   He tried to open it but couldn’t get it to budge.    He brought out a big pocket knife and tried to pry it open with the can opener.   He brought out a tent stake and picked up a big rock and tried to break open the lid.     Nothing.   Then his wife straddled it and he tried turning it with all his might.   It finally, to my great joy,  opened.

I never locked it again.  From then on I slept with my unlocked can next to me.

I told someone I met on the trail  my bear can story.  He told me he had to take a lighter to his lid to soften up the plastic.

I bought the bear canister in ’07.  When it arrived at Kennedy Meadows, I couldn’t open it.   Someone else wrestled it open for me.      A couple days later the same thing happened but again someone else was able to open it.   I thought then that this bear can could be trouble, but after that I didn’t have a problem with it.

I used it again in ’08 through the Sierra’s and didn’t have any problems with it but then I usually sleep with it and leave it unlocked.

Billy Goat carried a bear can for the first time this year.  The same one as mine but  his was the new one with 2 locks.  I warned him not to lock it but he accidentally locked the first lock and couldn’t get it opened.   I tried to open it but I accidentally locked the second lock.   Another hiker was able to open it using some tool.  He was mindful of never locking it again.

On the Bearvault website they say they will send you a free tube of lube for your canister.  Maybe that would help but I’m not sure I would risk being locked out of my food again.   And since I’m not going to lock it, why carry it.

BearVault 450 info: weighs 32.04 ounces (918 grams) I have fit 200 miles of food in it– 18,500 calories.

Gear list for 2010 hike(1300 miles Southbound PCT)

Stuff I wished I had:  Foot file, warmer sleeping bag or a sleeping bag liner through the Sierras, stove through the Sierras, a little bigger pack, more water carrying capacity in the dessert( I had a gallon jug swinging off the back of my pack which didn’t carry that well), med’s for Giardia, supplements, a pair of New Balance 817’s with pressure relief insoles in them, washcloth.

Current gear list

How to put thousands of waypoints on your Garmin GPS

Halfmile has benevolently bestowed,  on the hiking community, waypoints for every 1/2 mile of the Pacific Crest Trail (PCT)—over 6000 waypoints!    So how are you going to fit all those waypoints on your GPS that only allows 1000 waypoints?       Well, if you have a Garmin GPS that is recognized by the Garmin Point of interest(POI) loader,  Halfmile has figured out a way you can do it.

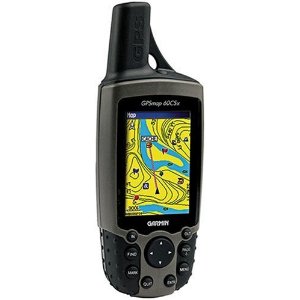
So get a Garmin  GPS that works with the POI loader.   I used a Garmin 60CSx that I bought at REI on sale for 199.00. It weighs 6.45 ounces with lithium batteries.   It’s pretty much the same GPS as my older 60C but my 60C won’t work with the POI loader.

Install the ” Mapsource Trip & Waypoint Managaer”  software, that came with your GPS, onto your computer.

Download Halfmile’s consolidated waypoints for:

California

Oregon

Washington

Unzip the files and put just the .gpx files in a single folder. So, you end up with a single folder with three .gpx  waypoint files…one each for CA, OR, & WA.

Now download the Garmin POI loader and plug your GPS into your computer via a USB cable.

Run the POI loader software, it will prompt you to select the folder where you placed the waypoint files and then it will load all the points in about 10 seconds.

He also offers this advice:

You will probably need to set the map zoom level that points display on your GPS. Go to the map screen(on your  GPS), select Menu > Map Setup – Points >and then set the Max Zoom for Map Points and User Waypoints to a value such as .5 miles. When set to .5 miles, waypoints and POI’s will display on the map screen when the map is zoomed in closer than .5 miles but will not display if zoomed out farther than .5 miles, so set the number to what works best for you. I set mine for 30 miles.

So there you go… over 6000 waypoints  saved as Points of Interest on  your GPS.   I’ve heard of people saving 10,000 waypoints this way.

Next you may also like to include all the topo maps for the PCT on your GPS.  So pop in your topo software.  I used Garmin USA topo but Halfmile recommends the Garmin West topo CD.  The topo software doesn’t come with the GPS it’s something you buy extra.
Next I hit the “find” menu “find places” and started typing in the towns for the PCT and marking them as waypoints.
Some towns are listed under “features” and not “cities”

Once you have all the towns marked, highlight all waypoints, right click and select “select maps around waypoints.” Now you should have  all or most of the maps  you need selected.  Look at the map and select any more maps you think you might need. Now transfer maps and waypoints to your GPS.

You don’t need a big memory card…I haven’t even put  anything on the little one it came with.

Note:  Garmins Topo software is nothing to write home about.  It’s often wrong.  For instance once I was standing on Pieper Pass and it said I was 278 ft from it.    On the CDT it said I was on the trail and I was on the side of a cliff.

Halfmile also freely offers all the printed topo maps for the entire PCT– available for download.

Related posts:

I have the whole PCT in my GPS

Protecting your GPS screen from getting scratched.

Gear Review: Mountain Hardwear Canyon shirt

I discovered this shirt in 2003 in a gear shop in Connecticut while hiking the Appalachian Trail and have been wearing one ever since.

My current hiking shirt had over 6000 miles on it and was duct tapped together;  I needed a new shirt and this is what they had.

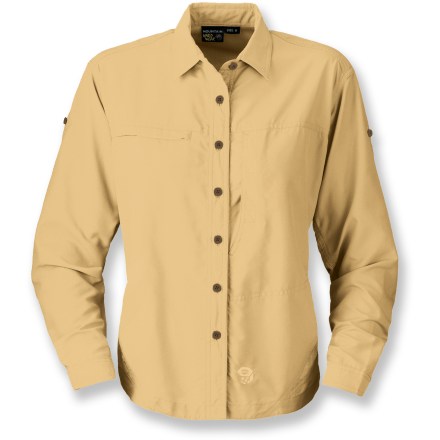
It looked good but I was thinking that it was built more for form than function.  I was wrong.   This is a good shirt.    It cleans well, wears well, stuff doesn’t fall out of the pockets, and mosquitoes can’t bite through it.   It has mesh side panels, flip up collar, rubber buttons, a big Neapolitan  pocket for maps, and zippered vertical pocket for reading glasses or what ever.

Comes in men’s or women’s style. The woman’s sizes run big.

It’s a 65 dollar shirt on sale at REI outlet right now for 32.93 dollars + you get 20% off  their discounted stuff which brings the price down to 26.33.   That’s a really good price for such a fine shirt.

Sock Sale

I’m gearing up.   I don’t know where I’m going but I’m packed.

After buying 2 pairs of Fox River Off Road socks in 2008 and hiking over 2000 trail miles in them, 1/2 of those miles while wearing  sandals,  and then wearing them all winter, and then hiking another 500 trail miles on them and then wearing them all the next winter, and then wearing them for many long walks in socking feet this spring, they have finally started to wear.   So I’m sock shopping.

I found them at Footsmart for 1/2 off and I entered the code: wmsshoe2 and got free shipping.   The short sock and the crew are both on sale.   They only cost 5.95-6.95   a pair now.

So for 12 bucks you can buy socks for a whole thru-hike.

Related Post: Best Socks Ever

The negligible effect of age on performance

This is from “Born to Run” by Christopher McDougall.

We monitored the results of the 2004 New York City Marathon and compared finishing times by age. What we found is that starting at age nineteen, runners get faster every year until they hit their peak at twenty-seven. After twenty seven, they start to decline.

So here’s the question — how old are you when you’re back to running the same speed you did at nineteen?

The answer: 64!

Great book: Born to Run

I just finished a book you’d love. It’s called “Born to Run: A Hidden Tribe, Superathletes, and the Greatest Race the World Has Never Seen” It’s by Christopher McDougall.

A good story and useful information—what more you could ask for. I couldn’t put it down.

My days of shelling out 700 dollars a hike for footwear are over.

These guys do 100 mile runs wearing homemade sandals. Their energy drink is chia seeds dissolved in water with lime and sugar added. And their energy food is pinole(roasted corn flour with sugar added, I believe). I think pinole is going to be the next corn pasta on the PCT.

Macabi hiking skirt

I bought my Macabi hiking skirt in 2004. I tried hiking in it on the CDT but my legs would get burned when I laid down for a nap and I got some chaffing between my legs.

I see many thru-hikers wearing them though, men and women, and they love it.

I wear mine all winter long with long underwear underneath. It feels warmer to me than pants. I also think there is something about wearing a skirt that is good for flow.

There are snaps to shorten the skirt. There is also a clip to make the skirt into pants or shorts. The shorts thing doesn’t really work because it’s still really easy to expose yourself…. maybe I was doing it wrong.

If it rains, you can shorten the skirt with the snaps and wear a trash bag skirt over it or put on rain pants and pack the skirt away till it stops raining.

One thing you need to be mindful of when wearing this skirt—don’t stand next to any heat source or it starts to melt and burn. I have little burns all over mine from standing near a campfire, a propane heater, and even just standing next to a wood stove.


Power naps

nap timeWhen I start dragging on the trail, I unfurl my Z-Rest and take a short power nap—maybe 20 minutes or so.

Most of the time it’s just me in my sphere on the trail.   So I lie down in the middle of trail confident that no one will be coming along.

I need to be careful  of doing that right out of town because there are often day hikers around.   One time I  felt sleepy coming out of town, so I laid down on the trail and went to sleep.  I woke up to a day hiker screaming because she thought I was dead.

A hiker on the Appalachian Trail told me this story:  She was hiking along when she saw a man lying on the trail.  He had his tent laid over him and a “Do Not Disturb” sign out.  “Odd place to take  a nap” she thought as she carefully slipped by him mindful of not disturbing him.   A little ways down the the trail she met a sheriff who said the man was dead.

Seam ripper: because your stuff shouldn’t talk

seam ripperThis is a seam ripper. You can use it to remove the company logos that have been sewn on to the outside of your clothes and gear.

There are enough ads in this world we don’t need them on our clothes.

Company names and logos look  bad and render clothes useless for anything but for the activity they were intended.

I once owned a nylon shirt in vibrant blue with no logos on it. I wore it for everything. When I took my dying mother on a cruise, I wore it with some black slacks and fake pearls to formal night. Then I wore it on a 5-month Pacific Crest Trail thru-hike. I kept wearing it every day for the next year. Then I wore it for the Florida Trail. Next, I wore it for the Appalachian Trail. Somewhere in Connecticut, I replaced it.

That was a good shirt. It didn’t have any logos so all I needed was one shirt that went from formal night on a cruise to hiking a long trail.

My grandchild is preparing to be born, so, I have been shopping for baby gear. The outdoor clothing manufactures are putting logos on baby clothes! I can’t believe anyone could be so crass.

They aren’t going to stop until people refuse to wear their company toting stuff.

Everything looks better without logos.

Related Posts: Yes, we have no logos
Removing the logo from your pot lid