Loading Gaia GPS with Halfmile’s tracks and waypoints for the PCT from a smartphone

With Gaia GPS loaded on your phone,

Click on which section you want:


California Section A — Campo to Warner Springs
GPS Track (the PCT) | GPS Waypoints (landmarks)


California Section B — Warner Springs to Highway 10 (near Cabazon)
GPS Track (the PCT) | GPS Waypoints (landmarks)


California Section C — Highway 10 to Highway 15 (Cajon Pass)
GPS Track (the PCT) | GPS Waypoints (landmarks)


California Section D — Highway 15 to Auga Dulce
GPS Track (the PCT) | GPS Waypoints (landmarks)


California Section E — Agua Dulce to Tehachapi Pass
GPS Track (the PCT) | GPS Waypoints (landmarks)


California Section F — Tehachapi Pass to Walker Pass
GPS Track (the PCT) | GPS Waypoints (landmarks)


California Section G — Walker Pass to Crabtree Meadow (near Mt Whitney)
GPS Track (the PCT)  | GPS Waypoints (landmarks)


California Section H — Crabtree Meadow to Tuolumne Meadow (Yosemite)
GPS Track (the PCT) | GPS Waypoints (landmarks)


California Section I — Tuolumne Meadow to Sonora Pass
GPS Track (the PCT) | GPS Waypoints (landmarks)


California Section J — Sonora Pass to Echo Lake
GPS Track (the PCT) | GPS Waypoints (landmarks)


California Section K — Echo Lake to Highway 80 (Donner Summit)
GPS Track (the PCT) | GPS Waypoints (landmarks)


California Section L — Highway 80 to Highway 49 (near Sierra City)
GPS Track (the PCT)  | GPS Waypoints (landmarks)


California Section M — Highway 49 to Belden
GPS Track (the PCT)  | GPS Waypoints (landmarks)


California Section N — Belden to Burney Falls State park
GPS Track (the PCT) | GPS Waypoints (landmarks)


California Section O — Burney Falls State Park to Highway 5 (near Castle Crag)
GPS Track (the PCT) | GPS Waypoints (landmarks)


California Section P — Highway 5 to Etna Summit
GPS Track (the PCT) | GPS Waypoints (landmarks)


California Section Q — Etna Summit to Seiad Valley
GPS Track (the PCT) | GPS Waypoints (landmarks)


California Section R — Seiad Valley to Highway 5 (near Ashland, OR)
GPS Track (the PCT) | GPS Waypoints (landmarks)


Oregon Section B — Highway 5 to Highway 140 (near Fish Lake)
GPS Track (the PCT) | GPS Waypoints (landmarks)


Oregon Section C — Highway 140 to Highway 138 (near Cascade Crest)
GPS Track (the PCT) | GPS Waypoints (landmarks)


Oregon Section D — Highway 138 to Highway 58 (near Willamette Pass)
GPS Track (the PCT)  | GPS Waypoints (landmarks)


Oregon Section E — Highway 58 to Highway 242 (McKenzie Pass)
GPS Track (the PCT) | GPS Waypoints (landmarks)


Oregon Section F — Highway 242 to Highway 35 (near Barlow Pass)
GPS Track (the PCT) | GPS Waypoints (landmarks)


Oregon Section G — Highway 35 to Cascade Locks
GPS Track (the PCT) | GPS Waypoints (landmarks)


Washington Section H — Cascade Locks to Highway 12 (near White Pass)
GPS Track (the PCT)| GPS Waypoints (landmarks)


Washington Section I — Highway 12 to Snoqualmie Pass
GPS Track (the PCT) | GPS Waypoints (landmarks)


Washington Section J — Snoqualmie Pass to Stevens Pass
GPS Track (the PCT) | GPS Waypoints (landmarks)


Washington Section K — Stevens Pass to Rainy Pass
GPS Track (the PCT) | GPS Waypoints (landmarks)


Washington Section L — Rainy Pass to Manning Park, BC
GPS Track (the PCT) | GPS Waypoints (landmarks)

If it asks you which program to open with, select GAIA GPS.

Keep loading all the tracks and waypoints for every section you are hiking.

Now, with the tracks and waypoints loaded for all the sections you want, in GAIA GPS, select the menu button at the top left corner, select tracks, select which track you want,  select “download map along track”, select “save”.    While you have wifi make sure you zoom in on the map.

If you have a computer you can download Halfmile’s complete files:

GPS Data By State:
California — from Campo to Ashland, OR | GPS Data
Oregon — from Ashland to Cascade Locks | GPS Data
Washington — from Cascade Locks, OR to Manning Park | GPS Data

unzip them and email them to your smart phone.

Under “Settings”  there is a user manual
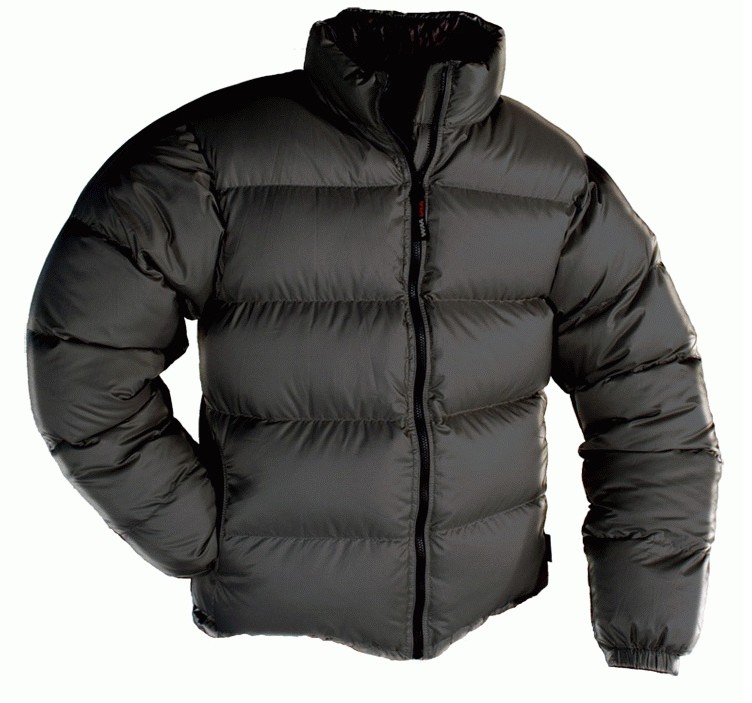
Gear review: Western Mountaineering Flight Jacket

flightjacketI’m in a motel room in Idyllwild.   Even though it’s late May in Southern California, winter is never far away when playing in the mountains and its freezing in the San Jacinto’s and I don’t want to leave the warmth of the motel room so I talk myself in to staying another night.
I’m snugged up in my warm sleeping bag and its time to get hiking but it’s too cold to leave my sleeping bag, so I stay in bed.

I stop for a break and suddenly I’m freezing.

This is why I carry this jacket:  Instant warmth.   It gets me out of my sleeping bag in the morning and keeps me happy and hiking when the weather turns frigid.

It doesn’t have logos on the chest.  It does have a tag on the side of it which you can cut off or take a sharpie to ink out the name.  You can also ink out the logo on the zipper pull.

I’ve carried it for at least 6 years; 10 ounces (283 grams) I never regret taking.

Western Mountaineering Flight Jacket


Resupply on the go

I’ve resupplied out of little stores on the trail now for years.  I look at it like foraging.   I don’t go in with an expectation of what I want but more a “lets see what’s available today” kind of attitude.    If I’m open and look at everything, I walk away with a resupply that is better than anybody’s box of stale food they dried months ago.

Once, while sitting out at the picnic table at Echo Lake,  a couple asked me if I got my box.  I said “no, I buy as I go.”    He said, “Well, I guess that’s okay if you don’t care what you put in your body.”   I watched them get their box, that they paid 35 dollars to have shipped from the East Coast, and unpack it.   Inside they had: organic instant oatmeal, organic ramen, vegan gummy bears,  organic dried apples and organic chips.    I had whole wheat tortillas, Cheese, nuts, peanut butter, fresh apples, and chips.  No wonder they were so crabby.

There are places though that a person walks through that don’t have a store and for those places a box would be very convenient.    Unless you have a person to send boxes for you, that can make it tough, on a long trail, as some places don’t want to hold your package for a long time and it’s hard to predict what you want to eat months in advance.

I’ve discovered a few options:

Jet.com is a new Amazon-like site that is often cheaper than Amazon.  They sell single and bulk items—including Kirkland (Costco brand) stuff.   Orders over 35 dollars ship free.

Amazon prime Pantry.   Where you can buy single items, instead of the bulk packages they usually sell,  and have it shipped to you for a flat rate $5.99.   You don’t have to fill a box; you can order as little as you want or as much as you want–up to 45lbs (20.4 kilos).   Looks like they even sell tortillas.  I don’t think they will ship to a post office though.

Another is Sonora Pass Resupply.   They have an online store and you can order food and other trail needs and they will ship to you anywhere on the Pacific Crest Trail maybe anywhere.    I think you can also send them your stuff and they will ship it to you.   Shipping is free on orders of 50 dollars or more.   They will also meet you at Sonora Pass and  hand deliver a resupply to you for 50 dollars.   They will also pickup and mail your bear can home from Sonora Pass for 15 dollars postage included and take out your trash.

Another is Zero day resupply.   They have an online store and I believe will ship anywhere.  They are even set up to do a bucket resupply at Muir Trail Ranch.  They  have a weight and calorie calculator for your order that makes things easy.


Current Gear List

  • Carried a Ursack through the Sierras–Probably not legal
  • NRS Neoprene Sandal Sock —for cold
  • light weight ice axe–  (the Camp Corsa  and the TICA ICE TOOL R5 are the lightest ones) and microspikes for snow sections
  • Rain pants in addition to rain skirt in Washington.
  • May need extra water bottle for dry sections.

All this gear, with the exception of the shirt,  has been trail tested for thousands of miles.  I’m confident with this kit I can handle whatever the world throws at me.   If any of it broke, I would replace it with the same thing.

Keeping your phone charged on the trail.

I love having a smart phone.  It’s a GPS, compass, emergency flashlight, holds maps and trail data.  I can listen to podcast, music, audio books.  On my Iphone, I had Wikipedia offline.  You can store books on it.    To me, its worth its weight.   If I need some gear, I can sit on a mountain top and order it sent to the next town.    I can keep abreast of fire closures and trail info.

Besides the water report in Southern California, I hike the PCT paperless now.

The GPS works even without cell service.  You can turn the sim off so it isn’t spending battery life searching for service.   I hiked the Camino in Spain and though I used the maps and the GPS through GAIA GPS app,  I never turned on the sim once.  Sometimes the GPS is not as accurate as a real GPS but it’s so much easier to load with your tracks and way-points.

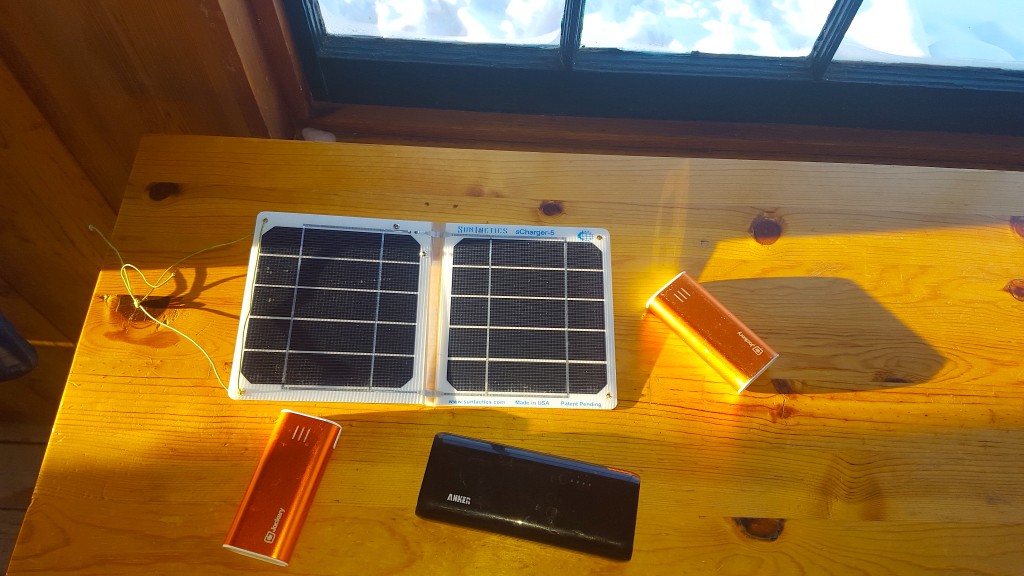
phone chargersIn southern California, on the Pacific Crest Trail, I carry a Suntatics solar panel and a small Jackery 6,000 mAh auxiliary battery.  The solar panel weighs 8.2 ounces (233grams) and the auxiliary battery weighs 5.5 ounces(155grams) There is plenty of sunshine and I’m usually laying in the shade when its hot, so I have plenty of time to charge my auxiliary battery with the solar panel while I sleep.    You need to be careful that your phone or auxiliary battery stays in the shade though.  Sometimes I would make shade for what ever I was charging with my umbrella.   The towns are close together  in So CAL and I just want to get in and out of them quickly and not wait for my phone to charge.   It’s freeing to have your own source of power.

It would work great in Arizona and New Mexico too, but as I move north the sun becomes a less and less reliable energy source.   I then send my solar panel home and up my auxiliary battery storage.

For the Oregon Coast Trail, this year, I used one huge battery.   The Anker 16,000 mAh.  It weighs 10.9 ounces (310 grams).

I also understand why people hike without a phone.   It can and most probably will distract from the experience.   There is a place on the PCT , off trail a little bit, with the most amazing sunset and views of many mountains in the distance.  I’ve camped there before and felt thrilled for such beauty.  Last time through, I climbed up there just as the sun was setting and laid out my pad and sleeping bag.  I glanced at my phone, saw there was service and when I glanced up again the sun was gone and it was dark.    I hope now that I have high speed internet at my cabin,  the internet won’t seem like such a treat that I give up enjoying a sunset on a mountain top for it again.

Related post: How-to-remember-your-cell-phone-when-leaving-town

Home modified 0 degree quilt

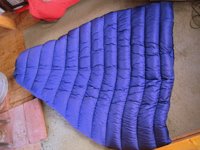
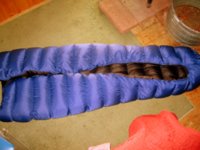
I did it.  I sliced into my new Marmot Helium and turned it in to something worthy of being in the mountains in September.  It weighs 31 oz, is chocked full of down, has not one cold spot, and is luxuriously wide.

First the bag weighed 35 oz.    Then I cut off the hood, the first baffle, the full length zipper, and the zipper baffle.    Then it weighed 24oz.  Next I took all the down from what I had cut off and stuffed it in to the quilt.   Then I took down from my old Marmot Helium  and stuffed even more down into it.   Then it weighed 34 oz.   Then I sewed the seams up and  took it to the laundry and washed it.   Now it weighs 31 oz. *

This isn’t the ethereal kind of loft you get from having  just washed your bag, this is the solid kind of loft  you get when your baffles are full of down.    If you slept in a shelter with this bag you’d have to say, “Please excuse my loft.”

For this project you will need: thread, pins, scissors, sewing machine, and a mummy bag.    Also a vacuum cleaner to clean up with.

To make the seams,  I just turned both edges inward, pinned them, and then sewed them up.

Difficulty rating: easy.  Tip: I did this with the down dirty—dirty down is much easier to handle than clean down.

*I brought two bags to the laundry and they both came back  3 oz lighter.   Which seems like it might justify the weight of a silk liner.

Update:  I headed out to the PCT with new quilt in late May.  In the  mountains above Idyllwild, less than 200 miles from the Mexican border, the temperature dropped to well below freezing, the wind was blowing 50-80 mph gusts and it snowed.

I was camping in Z-pack Heximid tarp which let in a lot of the wind.   The bag kept me warm till I rolled over and then I would get cold—I missed the zipper.   I think quilts are better for people how don’t move around much while they sleep.  Maybe if I had put elastic straps to hold it around my pad or ties…..

Now I carry a Z-packs 10 degree bag with a stretchy  liner.   Mostly I sleep with it as a quilt but when it is very cold I zip it.   I also went to using the Gatewood Cape as a tent because it blocks the wind better than the Heximid.

New PCT guidebook

I asked my library to purchase this new PCT hiking guide I wanted to check out:   “The Pacific Crest Trail–from Mexico to Canada on foot” by Brian Johnson aka Ancient Brit.    He’s hiked the PCT 3 times.

It’s a  small book of 350 glossy pages wrapped in a sturdy vinyl cover measuring 7″ x 4 1/2″ , weighing less than a pound, and costing less than 20 bucks.   I think it’s just what was needed.

The first 90 pages covers prep, equipment, planning, what the hiking is like, resupplying, permits, getting to trail, everything.      The next 229 pages are  maps, data, resupply info, trail angel info, water caches, alternate routes, elevation  profiles, town info, birds and plants you are likely to see,  interesting facts about the sites you pass, inspiring quotes, this book has it all.   The final 20 pages are appendixes covering useful websites, books written by PCT hikers, sample hiking schedules and more.

The maps aren’t topo maps and they wouldn’t help much if you got off trail,  but  here’s the thing: the book cost 18.95 16.47 from Amazon and covers the whole trail.

Gear review:BearVault 450 bear canister

It was  4am and I was lying in my frosty tent in the Sierras, thinking how splendid a hot beverage would be right now.  I was hungry as I hadn’t eaten dinner the night before because I was low on food and one of the ways I ration my food is to skip dinner.

I was thinking: for the same weight as the bear canister I could have brought my stove, pot, fuel canister, and 5 snicker bars.   Right now, I could be drinking a hot beverage and eating a snicker bar.   That would be good, but instead I have a bear canister.

I reached out of my tent, grabbed my frosty bear canister, tried to open it—it didn’t budge.     I straddled it and tried to open it,  it wouldn’t turn a bit—it was completely locked up.   And that is when I renamed my BearVault 450 bear canister: my “Goddamn, Piece of Shit!” bear canister.

The next food was 50 miles a way and it wasn’t 50 easy miles.  It was 50 of the hardest miles on the PCT.    I angrily broke camp, stuffed my  icy tent into my pack, and stomped off into the darkness.

Although I was mad and hungry there was a little part of me excited about the challenge of hiking 50 miles without food.

About 10am  I met a couple that I had been seeing off and on since Ashland.   I told them my bear can story.   He tried to open it but couldn’t get it to budge.    He brought out a big pocket knife and tried to pry it open with the can opener.   He brought out a tent stake and picked up a big rock and tried to break open the lid.     Nothing.   Then his wife straddled it and he tried turning it with all his might.   It finally, to my great joy,  opened.

I never locked it again.  From then on I slept with my unlocked can next to me.

I told someone I met on the trail  my bear can story.  He told me he had to take a lighter to his lid to soften up the plastic.

I bought the bear canister in ’07.  When it arrived at Kennedy Meadows, I couldn’t open it.   Someone else wrestled it open for me.      A couple days later the same thing happened but again someone else was able to open it.   I thought then that this bear can could be trouble, but after that I didn’t have a problem with it.

I used it again in ’08 through the Sierra’s and didn’t have any problems with it but then I usually sleep with it and leave it unlocked.

Billy Goat carried a bear can for the first time this year.  The same one as mine but  his was the new one with 2 locks.  I warned him not to lock it but he accidentally locked the first lock and couldn’t get it opened.   I tried to open it but I accidentally locked the second lock.   Another hiker was able to open it using some tool.  He was mindful of never locking it again.

On the Bearvault website they say they will send you a free tube of lube for your canister.  Maybe that would help but I’m not sure I would risk being locked out of my food again.   And since I’m not going to lock it, why carry it.

BearVault 450 info: weighs 32.04 ounces (918 grams) I have fit 200 miles of food in it– 18,500 calories.

Gear list for 2010 hike(1300 miles Southbound PCT)

Stuff I wished I had:  Foot file, warmer sleeping bag or a sleeping bag liner through the Sierras, stove through the Sierras, a little bigger pack, more water carrying capacity in the dessert( I had a gallon jug swinging off the back of my pack which didn’t carry that well), med’s for Giardia, supplements, a pair of New Balance 817’s with pressure relief insoles in them, washcloth.

Current gear list

US goverment warns Southbound thru-hikers

According to this article the US is warning Southbound PCT(Pacific Crest Trail) hikers that they could face a year in jail and a 5ooo dollar fine for entering the US through the PCT.

For north-bounders it’s legal to enter Canada through the PCT, if you get your permit from Canada, because, despite what Sutton at the border crossing says, you don’t need permission from the US government to leave the country.

How to put thousands of waypoints on your Garmin GPS

Halfmile has benevolently bestowed,  on the hiking community, waypoints for every 1/2 mile of the Pacific Crest Trail (PCT)—over 6000 waypoints!    So how are you going to fit all those waypoints on your GPS that only allows 1000 waypoints?       Well, if you have a Garmin GPS that is recognized by the Garmin Point of interest(POI) loader,  Halfmile has figured out a way you can do it.

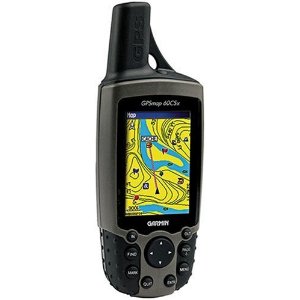
So get a Garmin  GPS that works with the POI loader.   I used a Garmin 60CSx that I bought at REI on sale for 199.00. It weighs 6.45 ounces with lithium batteries.   It’s pretty much the same GPS as my older 60C but my 60C won’t work with the POI loader.

Install the ” Mapsource Trip & Waypoint Managaer”  software, that came with your GPS, onto your computer.

Download Halfmile’s consolidated waypoints for:

California

Oregon

Washington

Unzip the files and put just the .gpx files in a single folder. So, you end up with a single folder with three .gpx  waypoint files…one each for CA, OR, & WA.

Now download the Garmin POI loader and plug your GPS into your computer via a USB cable.

Run the POI loader software, it will prompt you to select the folder where you placed the waypoint files and then it will load all the points in about 10 seconds.

He also offers this advice:

You will probably need to set the map zoom level that points display on your GPS. Go to the map screen(on your  GPS), select Menu > Map Setup – Points >and then set the Max Zoom for Map Points and User Waypoints to a value such as .5 miles. When set to .5 miles, waypoints and POI’s will display on the map screen when the map is zoomed in closer than .5 miles but will not display if zoomed out farther than .5 miles, so set the number to what works best for you. I set mine for 30 miles.

So there you go… over 6000 waypoints  saved as Points of Interest on  your GPS.   I’ve heard of people saving 10,000 waypoints this way.

Next you may also like to include all the topo maps for the PCT on your GPS.  So pop in your topo software.  I used Garmin USA topo but Halfmile recommends the Garmin West topo CD.  The topo software doesn’t come with the GPS it’s something you buy extra.
Next I hit the “find” menu “find places” and started typing in the towns for the PCT and marking them as waypoints.
Some towns are listed under “features” and not “cities”

Once you have all the towns marked, highlight all waypoints, right click and select “select maps around waypoints.” Now you should have  all or most of the maps  you need selected.  Look at the map and select any more maps you think you might need. Now transfer maps and waypoints to your GPS.

You don’t need a big memory card…I haven’t even put  anything on the little one it came with.

Note:  Garmins Topo software is nothing to write home about.  It’s often wrong.  For instance once I was standing on Pieper Pass and it said I was 278 ft from it.    On the CDT it said I was on the trail and I was on the side of a cliff.

Halfmile also freely offers all the printed topo maps for the entire PCT– available for download.

Related posts:

I have the whole PCT in my GPS

Protecting your GPS screen from getting scratched.

New Pacific Crest Trail(PCT)navigational aids

Pocket Pct

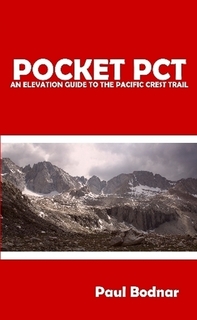
I found this little book on the Internet.  It’s called  “Pocket PCT— An Elevation Guide it the Pacific Crest Trail.”   It weighs 3.8 oz(108 grams) and covers the entire trail.

I’ve never used it or even seen it but it looks really useful.   I may try it out the next time I hike the PCT.

It cost 19.95 which is 10 dollars more than the Wilderness Press PCT Data Book but I was thinking it might be more accurate.    The Wilderness press data book is missing some important water sources and it doesn’t always show you when you are at the top of a climb.

The Pocket PCT is built around an elevation profile of the entire 2655 miles of the Pacific Crest Trail from Mexico to Canada. The mile-by-mile elevation profile is represented in chapters, each beginning and ending at a common resupply location. The detailed profile shows water sources (each rated by reliability), water cache locations, resupply points, and hundreds of other landmarks such as campgrounds, roads, creeks, rivers, and trails. Symbols identify each point of interest and includes that point’s elevation (and directions if off-trail). Commonly used resupply point addresses and other information is included in the back of the guide, including directions to each resupply point from the trail.

It doesn’t have any maps in it, but maps and way points for the entire trail can now be downloaded for free from Halfmile’s Pacific Crest Trail Map Site